Featured post

The Scottish Islanders

  Get your copy from  www.shop.yachtarchive.scot  !

Tuesday, 13 March 2018

Building the Mast - Chapter Three


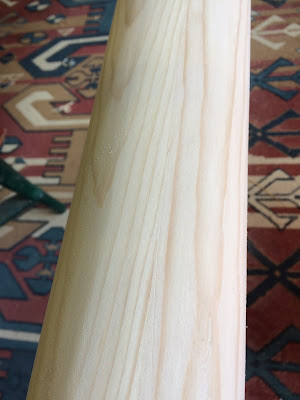
That's the mast basically finished. It's now stored in the Great Hut with the plastic bag to stop people poking their eyes out on it, not ideal but better than this. 


The Great Hut started out in life as a boatbuilding workshop, then later we lived in it for two years while the house was built, by which time there was also a garage, which of course became the workshop and then the GH was suddenly taken over as a sort of women's retreat, complete with fridge, ashtrays, television, heater, seating and even a sewing machine. The spars will have to live here on suffrage, but I fear it won't be popular.

I'm quite pleased with the stage it's now at. It's a bit heavier than it could have been, but pretty strong and the glue joint is perfect.


I've now also made the boom, which is a rectangular hollow section, solid at the ends, and much easier to put together than the mast was. Here is the sequence:

First, strips about 5/8th inch put together, with a straight batten to keep them in order. Note cling film keeps the glue off the hands and clamps


Gluing done, ready to clean off and plane.


Flat top face, 1/2 inch thick, added. Another ten clamps borrowed for this.


Turned over the bottom face added.


Cleaned off, ends trimmed, corners rounded, preliminary sanding.


To finish off, the mast and boom will both need external blocks for strops and fittings, then outboard ends will get painted white and the finished spars varnished.

Like the mast, the boom is overweight, probably stronger than it needs to be by a huge margin, but I don't think that's too bad a thing. What now requires a lot of thought is how light I dare make the gunter yard/gaff/call it what you will, because weight aloft is a very bad thing. But of course so is a broken spar...

Wednesday, 7 March 2018

Survival of an old Lady - Chapter 4 - she swims again


Stroma's old mast and sails were in very poor condition and I had decided at the start of the project to replace both, because I intended to sail without an engine and needed the sail power to be totally reliable.

Scottish Islands ODs were originally fitted with engines, either a single cylinder Watermota or a Coventry flat twin and the Class had a rule that if you didn't fit an engine you had to have a dummy propellor and carry equivalent weight. In fact these early engines weighed very little, roughly the same as a decent bower anchor and chain. Certainly even the smallest of modern diesels would risk unbalancing the boat and I had no intention of going back to a single cylinder petrol motor in view of the fire risk and the fact that kept in the damp space beneath the cockpit sole it would never start.

I ordered a mast from a major, well-known company and was extremely disappointed when it arrived. Rather than the pear-shaped profile of a traditional mast this was simply a round, tapered stick and as a result seemed very thin at the top. Fortunately a friend was looking for a mast and when he didn't agree with my assessment this first attempt went to a good home and I recovered some of the cost. Sadly it broke a few years later during a race in blustery conditions.

After taking advice I found the wonderful Alastair Garland, who needed absolutely no instruction from me to produce a spar that was a work of art, as well as extremely strong. 

The new sails came from the legendary Gayle Heard of Tollesbury, whom I already knew, as he had already made a suit for Sonas and a spritsail for my wherry.

Stroma was rigged, as Sonas had been, by Iain Gillies, the former head rigger at McGruers and a man of great skill and humour who became a good friend.


It would be tiresome to recount all the remaining steps up to September 2003, when Stroma finally hit the water again. I'll just say that as the launching date draws ever nearer the list of undone tasks becomes longer and longer.

It was a great relief to find that the weight of the materials I had added to give strength and customise the interior had exactly balanced the saving that resulted from having a hull that didn't absorb water, with the result that Stroma floated level and precisely to her original marks.


Tuesday, 6 March 2018

Survival of an old Lady - Chapter Three


With Stroma near home in Argyll I could speed up progress by working at weekends rather than weekdays when the normal job allowed.

The first task was building the cabin sides, from marine plywood that was later given a good outer surface of mahogany from a beautiful big plank that I had come across.

Decisions had to be taken about how closely to follow the design. Alfred Mylne had drawn curved corners at the front end of the cabin, but McGruers had built them sharp, starting a debate on which was authentic, with Mylne winning.

The cabin roof proved challenging with the curvature flattening forward.


Quality control inspection

Sonas in the background, being worked on for the new owner
Cabin structure nearly complete

The original main beam with the Official Number was kept

Reunited with her keel

Ready for fine joinery work
As work proceeded individual components became more intricate and demanding to make, but also more fun.

I spent a lot of time wondering how to replace the original rudder stock trunk, which seemed to have started out in life as a piece of iron drainpipe. It had rusted almost through and could have sunk the ship in seconds had it collapsed underway. I couldn't find a satisfactory replacement and was worried about the tendency of plastics to behave in strange ways afar prolonged exposure to water. Eventually I decided to make a tube from thin staves of Western Red Cedar, barrel-fashion, coated with woven roving and then protected from any glancing blows by a stout ash timber glued on the forward side.

partial bulkheads replace original iron posts

chart storage


the correct way to build a watertight hatch, like a Roman fort with two walls


to be continued... Click here

Survival of an old lady - Chapter Two - ends in evil thoughts!


The first step in any restoration is to discover how much you've let yourself in for. Stripping off the deck revealed that most of the deck beams were either burst or rotten.

The stem was in a disastrous condition. It would have been made from a piece of oak selected for its curve, but the yacht was damaged at Hunters Quay sometime soon after the War when a ferry ran into her and a couple of feet had been replaced at the top. The original and new sections were both seriously rotten, quite a common problem when you consider how susceptible oak is to fresh water.

There's a special sort of archaeology involved in rescuing old boats. While received wisdom says that the ancients always produced dovetailed joints we found that the deck beams had in fact been lodged in notches in the shelf with each held in place by one iron nail. The elm frames would have been steamed and pretty hot when put in, so it wasn't surprising to find that quite a few had failed to find the little sockets in the hog that had been made for them.

It was obvious that the stem would need to be replaced. To keep the hull in shape I decided first to repair the beam shelf and reinstate the forward deck beams. Here is a sequence of images showing my late pal Duncan working on the rotten shelf and our efforts at scarfing in the new sections. A couple of months later I sat beside Duncan in hospital and he made me promise that I'd make sure "she'd swim again".


While doing this we made and fitted the forward deck beams.

Port side shelf done, starboard glued up

After the forward stem was removed the hull was kept in shape with a system of wooden blocks to keep the planking in line tensioned with Spanish windlasses.


Using the old stem as a template I made the new one alongside, from clear Douglas Fir laminated with epoxy.


Attention turned to the area at the foot of the stern post, where removal of planking revealed that the post itself was split. I made a new one. Likewise the transom had been badly damaged at Irvine and was replaced. Unable to find a suitable chunk of mahogany to handle the radius the new one was laminated from marine plywood.


Up to this point I had hoped that I could complete the job without taking Stroma off her ballast keel, but it was now clear that this would be necessary.

Excavations at this point showed that the hog was badly rotten, also the floors, while not totally rotten, had numerous shakes. It's an interesting speculation that most of these probably occurred soon after Stroma was launched in May 1929, as they had been built from oak crooks selected on the basis of the shape being approximately correct. I have read that members of the McGruer family would scour the woods looking for suitable pieces for this purpose.

It was going to be impossible to find suitable pieces of oak to build a new hog and floors, even had I wanted to. Availability of top quality marine plywood meant that they could be built to a much higher strength and durability than had been possible first time round. Here, the patient has just been lifted off her keel and the rudder dropped out.


The keel is carefully shored to keep it in shape. Originally she had eight bolts, positioned diagonally, worked from iron, which remained embedded in the lead after the sections through the hog had rusted away. The ones you can see are four of five bronze bolts added later, the fifth one being a little short fellow though the front. I was later to stand on the keel and drill another eight holes, staggered opposite the original ones, just because I felt I should. It was an interesting exercise, which included me being thrown off once when the drill bit caught in the lead. The end result is that Stroma now has a ridiculous number of bolts.


Here are some of the new floors in place.


And the new hog and stern knee.


And finally replanked.


At this stage, with new carlins and all the deck beams done, Stroma was beginning to come alive again.


At this point I began to have evil thoughts about giving the whole ship a sheathing of woven glass roving and epoxy. I won't write a long essay about the pros and cons of doing this, as it has been discussed endlessly, usually be people who have no experience of doing it, but may have come across some of the disastrous fibreglass and polyester jobs that were done in the 1950s and 1960s. My friends in the Freundeskreis Klassiker Yachten even have a name for the process, which translates as a dead man's winding sheet.

After very careful reading of all the literature I could find, plus discussing with my boatbuilder friend who had at that stage built about sixty boats (now up to about eighty) with no problems, the decision was made. My reasoning was that having basically replaced everything that in the old boat could absorb water and swell with materials that couldn't the gain in strength and stability was worth the expense and work involved. While the yacht was off her keel the coating could be taken round the hog, avoiding a major reason for not doing it.

The hull was now careened to get proper access and the work done over a very hard and messy weekend under the professional supervision of my good friend Richard.


Now, fully put back together again and much stronger than when she was built, I decided to bring Stroma a hundred miles nearer home in Argyll to get on with the work of reconstructing the cabin, cockpit and interior to Alfred Mylne's original design.


 to be continued... here Chapter Three

The Wherrymen

The Wherrymen
Two old friends on the water